Plant Care
Why Your Tomato Leaves Are Turning Yellow: 7 Causes and Fixes
Few things in a garden are as deflating as watching a healthy tomato plant start to pale from the bottom up. One week the leaves are deep green and glossy; the next, the lower ones look washed out, and by the time you notice, half the plant seems to be turning. Yellow foliage is the tomato's way of sending a message, and the trick is learning to read it. Water, nutrients, roots, disease, insects and plain old weather can all produce similar-looking symptoms, but they rarely produce identical ones. Where the yellowing starts, how it spreads, and what the rest of the plant is doing will usually point you toward the cause.
1. Watering: the most common culprit, in both directions
Tomato roots need moisture and air in roughly equal measure. Too little water and the plant sacrifices its oldest leaves first, pulling mobile nutrients out of them to keep the new growth alive — the lower foliage fades to a dull yellow and eventually crisps at the edges. Too much water is just as damaging: waterlogged soil pushes out oxygen, roots suffocate, and the plant yellows from the bottom while the soil stays stubbornly damp.
Before you do anything else, check the soil. Push a finger two inches down near the stem. If it is bone dry, you have your answer. If it is cool and soggy, stop watering and let the surface dry out. Potted tomatoes are especially unforgiving: a container that never drains properly will rot roots within days, so make sure the drainage holes are open and that the pot is not sitting in a saucer of standing water.
Once you have corrected the immediate problem, aim for consistency rather than perfection. A deep soak twice a week beats a light sprinkle every day, because it encourages roots to grow downward. Mulch with straw or compost to buffer against drying out, and water at soil level in the morning so the leaves have a chance to dry before evening. Wet foliage overnight invites trouble.
2. Nutrient shortages: read the leaf before you feed
Tomatoes are heavy feeders, and yellowing is often a hunger signal. The colour pattern tells you which nutrient is missing, and the position of the leaf tells you whether the plant is mobile enough to move that nutrient around.
Nitrogen
Nitrogen deficiency shows up as a general, even pale yellowing of the oldest leaves, moving upward. The whole leaf fades rather than developing patches. A quick fix is a liquid feed high in nitrogen, but do not overdo it: too much nitrogen pushes lush leafy growth at the expense of fruit. Side-dress with compost or a balanced organic fertiliser and water it in.
Magnesium
Magnesium shortage produces yellowing between the veins on older leaves, with the veins themselves staying green. It is common in sandy soils and in containers where the nutrient has leached away. A foliar spray of Epsom salts diluted in water, applied in the evening, often greens things up within a week or two.
Iron and sulfur
These behave the opposite way: the newest leaves at the top turn yellow first. Iron deficiency typically leaves green veins against a pale background, while sulfur deficiency produces a more uniform yellowing of the growing tips. Both are frequently a pH problem rather than a shortage, which brings us to the next section.
3. Soil pH and nutrient lockout
A nutrient can be sitting right there in the soil and still be unavailable. Tomatoes prefer a slightly acidic soil, roughly pH 6.0 to 6.8. Below that range, calcium and magnesium become harder to absorb; above it, iron and manganese lock up — which is why an alkaline bed can produce iron-deficient plants even in rich soil. A simple home soil test kit costs little and settles the question quickly. If your pH is badly off, add compost to buffer it, and adjust gradually with garden lime to raise it or elemental sulfur to lower it. Chasing a serious pH problem with liquid feed alone is like mopping the floor with the tap still running.
4. Root problems below the surface
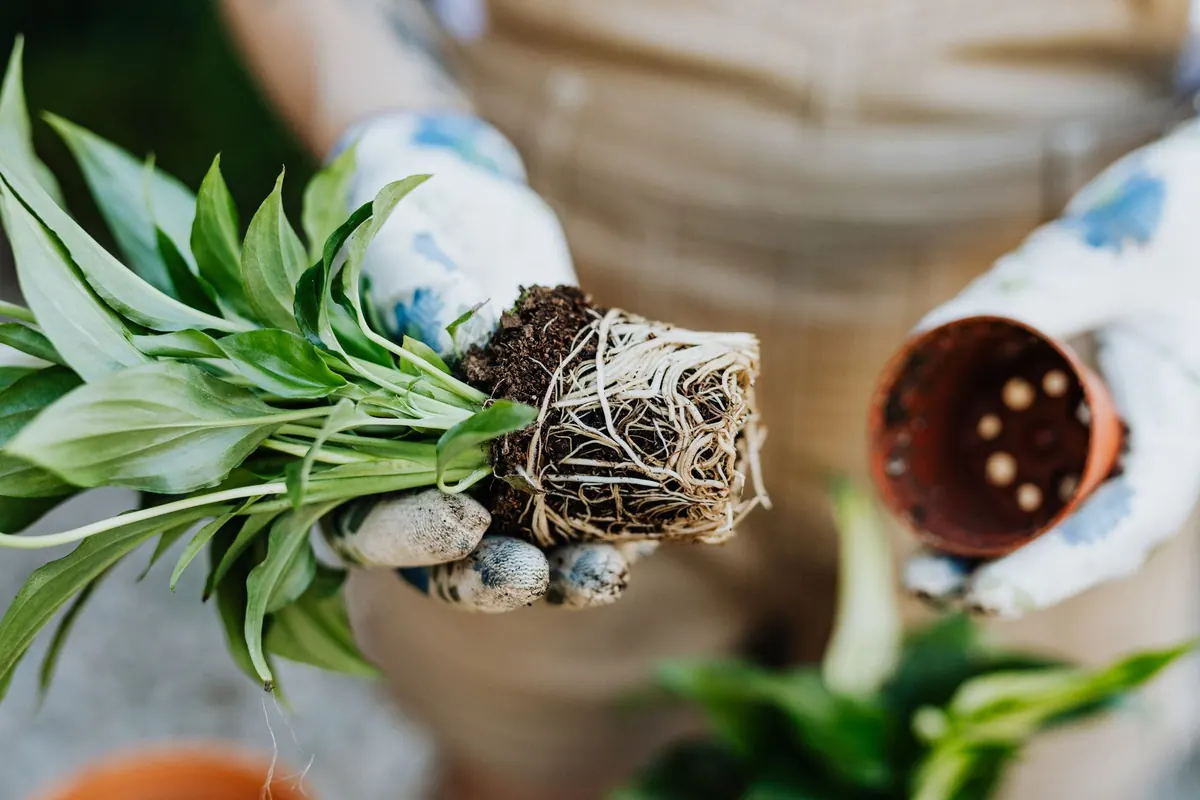
Everything the plant does depends on its roots, and yellowing that appears alongside wilting, slow growth and poor fruit set often starts underground. Dig up a struggling plant and look: healthy roots are white or pale tan and firm. Brown, mushy roots that slide off in your hand mean root rot, usually from overwatering or poor drainage. Dark, gnarled lumps on the roots suggest root-knot nematodes, more common in warm sandy soils.
Compacted soil and pot-bound roots cause the same symptoms without any pathogen at all — the plant simply cannot take up water and nutrients fast enough. When planting, loosen the surrounding soil, and never set a tomato into a hole filled with heavy clay. If a container plant looks yellow and stunted, tip it out and check whether the rootball has turned into a tight spiral; if so, tease the roots apart and repot into something larger.
5. Disease: when the yellowing has edges
Diseases tend to produce yellower patterns with sharper boundaries than nutrient problems. Two are worth knowing well. Fusarium wilt often yellows one side of a plant or even one side of a single leaf, starting on the lower leaves and progressing upward; cut a stem lengthwise and you may see brown discolouration inside. Verticillium wilt behaves similarly but more slowly, with yellow, V-shaped patches spreading from the leaflet tips inward. Neither can be cured once established — remove and dispose of affected plants, and rotate your tomato beds so the same ground is not used for several seasons.
Early blight is easier to spot: brown spots with concentric rings, surrounded by yellowing tissue, usually on older lower leaves first. It spreads upward in wet weather. Mulch to stop soil splashing onto leaves, water at the base, and remove affected foliage promptly. Viruses such as tomato yellow leaf curl cause cupping, distortion and yellowing of new growth, and are spread by whiteflies; infected plants should be pulled out, since there is no treatment.
6. Pests that drain a plant dry
A heavy infestation of aphids, spider mites, thrips or whiteflies can leave foliage yellow, mottled and stippled. Turn the leaves over and look closely — mites are tiny specks, aphids cluster on new growth, and whiteflies lift off in a puff when disturbed. Strong jets of water, insecticidal soap, and encouraging ladybirds and lacewings in the garden will usually keep numbers in check. Check the undersides of leaves weekly; early detection is far easier than a rescue mission.
7. Cold, sun and other environmental knocks
Chilly nights below about 10°C slow nutrient uptake and leave plants looking pale and sulky, especially early in the season. Sudden strong sun after a cloudy spell can scorch exposed leaves. Herbicide drift from a neighbour's lawn, or even contaminated manure or compost, causes distorted, yellowing, strap-like growth that you cannot fix — remove the affected plants. Transplant shock and heavy pruning produce temporary yellowing too. Give the plant a week or two before assuming the worst.
A five-minute diagnostic routine
When you spot yellow leaves, resist the urge to feed first. Work through this instead:
- Check the soil at root depth for wetness, dryness and smell. Fix water before anything else.
- Note where the yellowing began — old leaves, new leaves, one side, or margins.
- Inspect the undersides of several leaves for insects, webbing or fine stippling.
- Look for spots, rings or V-shaped patches that would suggest disease.
- Test soil pH if the pattern points to iron or magnesium.
- Give it a week after correcting the obvious cause before adding fertiliser, so you can see what actually worked.
Finally, remember that the lowest one or two leaves on a big, healthy tomato plant will occasionally yellow and drop as the plant matures. That is normal housekeeping, not a crisis. It is the spreading yellow, the yellow that comes with wilting or mottling, that deserves a closer look. Photograph the plant, note what changed in the days before, and act on the most likely cause rather than all of them at once. Tomatoes are forgiving plants, and most yellow leaves are a request for attention, not a death sentence.
Related Articles